
Turtle Vine Care: Complete Guide (Including Propagation)
Last Updated: October 2025
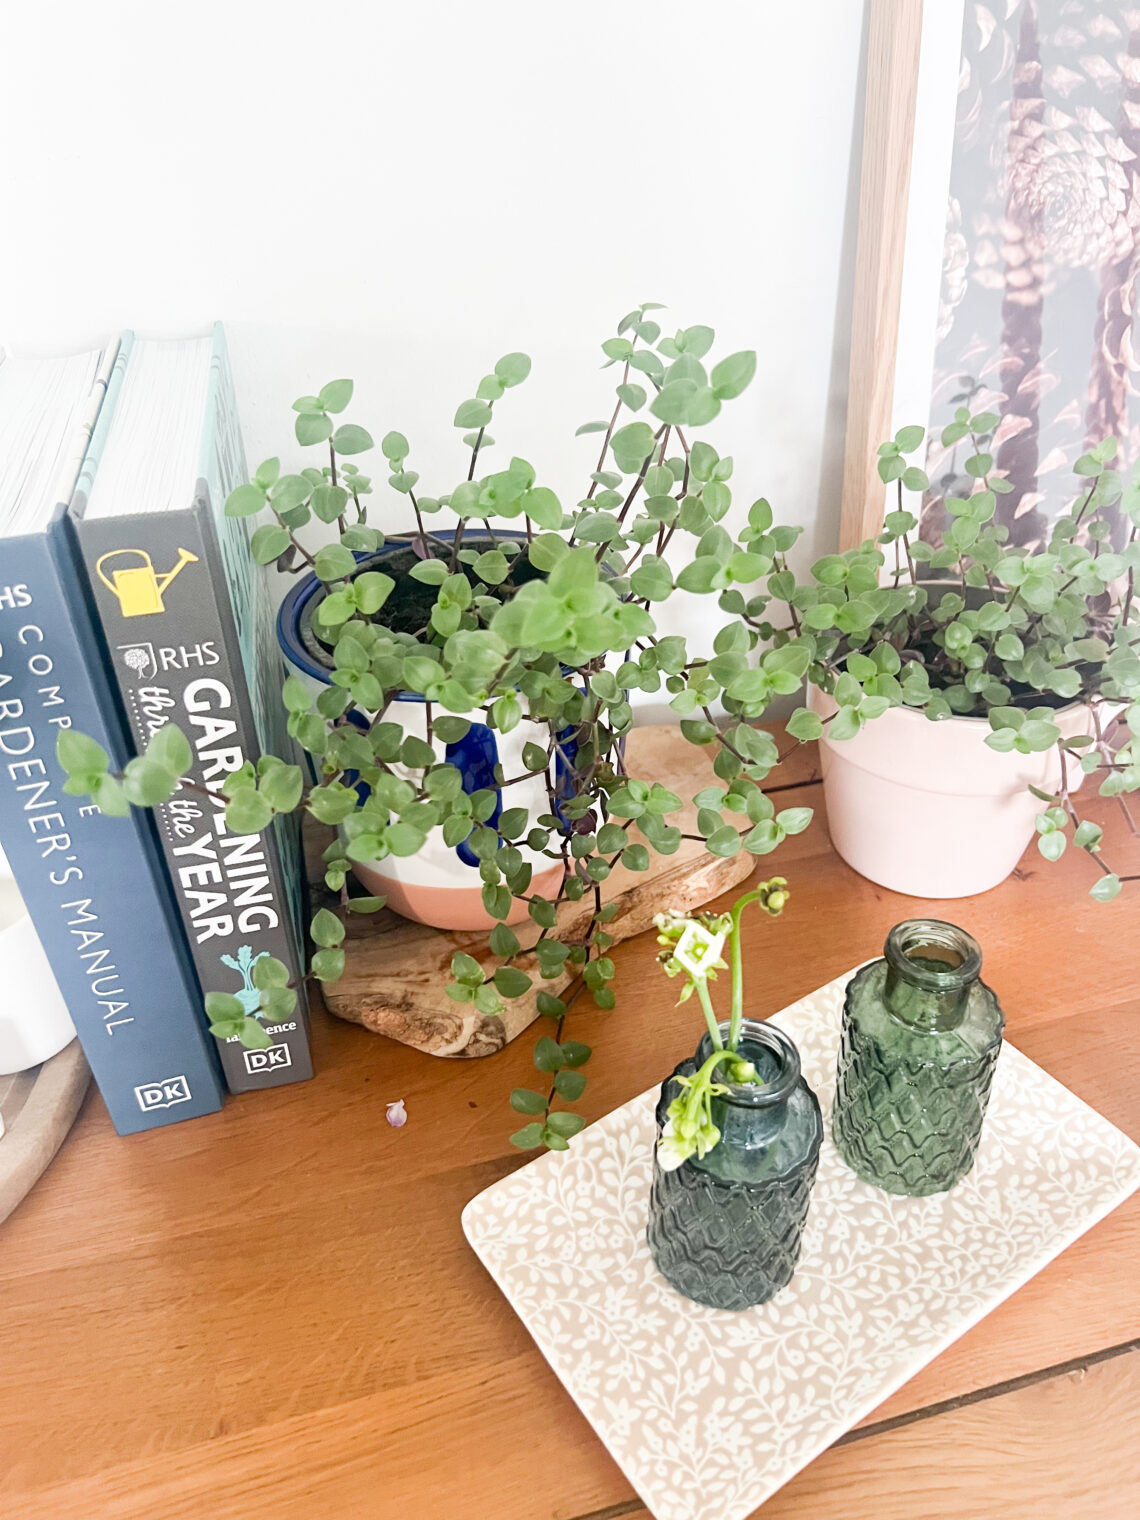
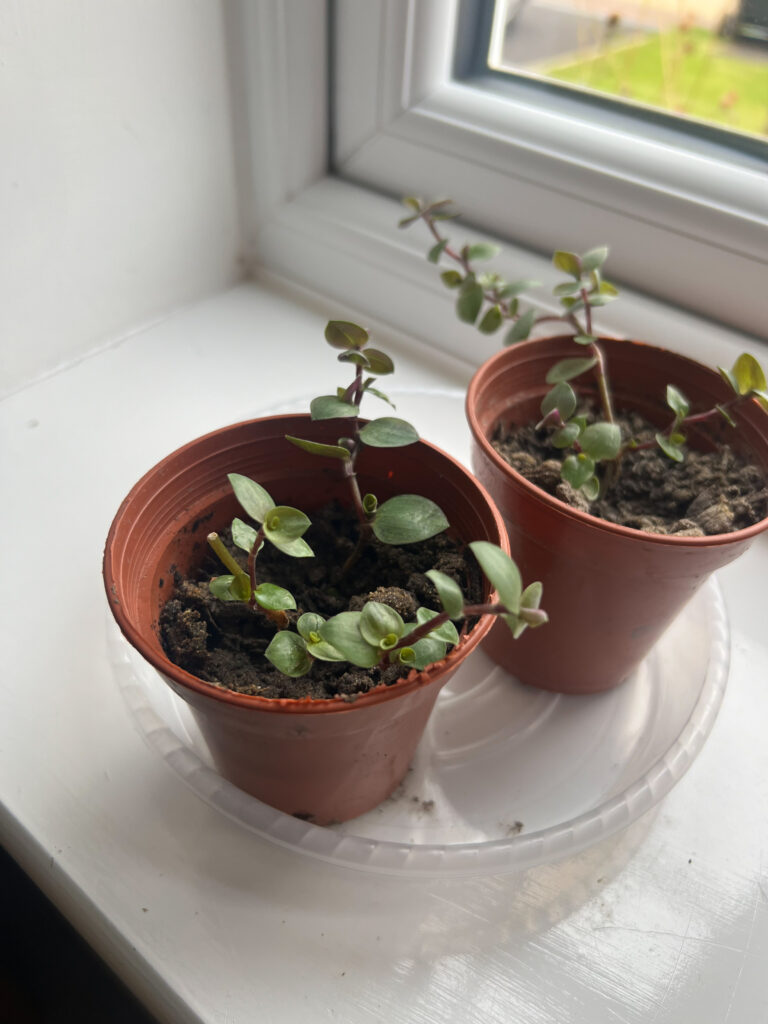
I’ve only recently started my journey with indoor plants, and it’s been a lot of fun! I actually came across the turtle vine by accident! I bought a money plant and a few weeks later, I noticed something growing in it. I know money plants can have pups that you pull out and plant to make new plants, so that’s what I did. But it didn’t look like a money plant. It took a while for me to figure it out, but I finally was able to identify these two little plants as turtle vines! I love them so much. I’ve grown them from little babies into full, beautiful plants. I feel very proud!
Good news: Turtle Vine Care is easy. Even I could do it, as a beginner plant mum not even knowing what it was!
The turtle vine, known scientifically as Callisia Repens, has small leaves and vibrant purple stems. This plant is from tropical South America but has made its way into the hearts and homes of plant lovers worldwide due to its simple needs and striking appearance.
So let’s learn about the process of planting, growing, and maintaining this beautiful trailing plant. By following my tips on light requirements, watering methods, soil types, and more, you’ll see your turtle vine flourish.
Quick Care Summary
| Care Aspect | Requirement |
|---|---|
| Light | Bright, indirect light (6+ hours daily) |
| Water | Weekly; let top 2 inches dry between waterings |
| Humidity | Moderate (40-50%) – average home humidity is fine |
| Temperature | 15.5-26.5°C (60-80°F) |
| Soil | Well-draining potting mix with perlite |
| Fertilizer | Every 4 waterings in spring/summer |
| Growth Rate | Fast – can grow several inches per month |
| Difficulty | Easy – perfect for beginners! |
| Pet Safe | Generally safe, but may cause mild stomach upset if eaten |
- Quick Care Summary
- Planting Turtle Vine
- Growing Conditions
- Maintenance and Care
- Complete Propagation Guide
- Troubleshooting Common Problems
- Different Varieties
- FAQs
- 1. Is turtle vine easy to care for?
- 2. How do I make my turtle vine bushier?
- 3. How fast does turtle vine grow?
- 4. Can I propagate turtle vine in water or soil?
- 5. Why is my turtle vine turning yellow?
- 6. Does turtle vine need a lot of light?
- 7. How often should I water my turtle vine?
- 8. Is turtle vine toxic to pets?
- 9. Why is my turtle vine leggy?
- 10. Can turtle vine grow in low light?
- 11. When should I repot my turtle vine?
- 12. Can I grow turtle vine outside?
- 13. How do I prune turtle vine?
- 14. What’s the difference between turtle vine and inch plant?
- 15. My turtle vine is bare at the base with growth only at ends – what should I do?
- Good Luck With Your Turtle Vine Plant!
Planting Turtle Vine
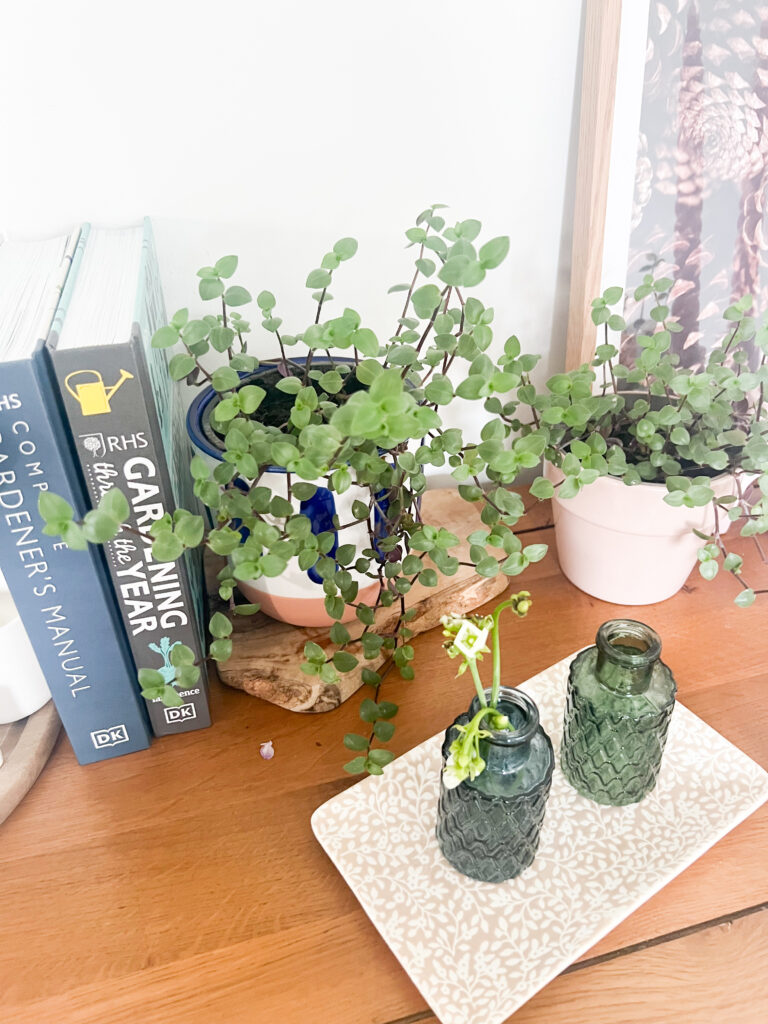
To plant Turtle Vine, select a pot with good drainage holes and choose well-draining soil. Ensure the plant receives bright indirect light and water it thoroughly when the top two inches of soil feels dry.
Choosing the right soil
Picking the perfect soil for your turtle vine is key. This plant loves well-draining ground. A good mix often includes ordinary potting compost that lets water through easily but keeps roots moist. Mine does well with some perlite mixed in.
Ideal soil recipe:
- 2 parts standard potting mix
- 1 part perlite or orchid bark
- Optional: A handful of peat moss or coco coir for moisture retention
Make sure it’s not too heavy or dense to avoid drowning the plant. The best pH level for this green friend lies between 5.0 and 6.5, slightly acidic. Every few years, changing the earth in your pot helps prevent root rot—a common issue with these types of plants.
What to avoid:
- Heavy garden soil
- Soil without drainage amendments
- Mixes that stay soggy
- Very alkaline soils
Selecting the appropriate pot
Choosing the right container for your turtle vine is key to its health and spread. Go for pots one to two sizes bigger than the plant’s current home. This gives it space to grow without cramping its style. Pots with multiple drainage holes are a must. They stop excess water from sitting at the bottom and hurting the roots.
Terracotta or ceramic pots are great for housing turtle vines. Their breathable nature helps manage moisture levels, crucial during the growing season. Bear in mind, these plants sprawl out 2 feet or more and stand about 10 to 15 centimetres tall. A larger pot supports this growth while ensuring proper care for attractive foliage and healthy trailing vines.
Best pot options:
- Terracotta (breathable, helps prevent overwatering)
- Ceramic with drainage holes
- Hanging baskets (shows off trailing habit beautifully)
- Wide, shallow pots (roots spread horizontally)
Pot size guide:
- Small cuttings: 10-12cm pot
- Established plants: 15-20cm pot
- Mature trailing plants: 20-25cm wide pot or hanging basket
Growing Conditions
To ensure the successful growth of your turtle vine, it’s vital to provide adequate light, water, and suitable temperature and humidity levels. Consistent monitoring of these factors will promote healthy foliage and encourage bushier growth.
Light requirements
Turtle vine thrives in bright, indirect sunlight for at least six hours a day. East and west-facing windows make excellent choices for placing your plant. This ensures the turtle vine gets enough light without direct exposure that could harm its leaves.
Best locations:
- East-facing windows (gentle morning sun)
- West-facing windows (afternoon light)
- 1-2 metres from a south-facing window
- North-facing windows with very bright light
- Under grow lights
Signs your plant needs more light:
- Pale leaves
- Yellowing leaves
- Leggy, stretched growth
- Loss of purple colour on stems
- Slow growth
Signs of too much direct sun:
- Brown, scorched leaf tips
- Faded leaf colour
- Leaves curling inward
- Dry, crispy texture
Moving it to a spot with better lighting often fixes low-light issues quickly. It’s all about finding that sweet spot where your turtle vine can soak up just the right amount of sunshine for bushier growth and vibrant health.
Watering methods
Give your turtle vine a drink once a week to keep the soil moist. This plant loves water, but it doesn’t want to swim in it, so make sure you let the earth dry out a bit between sessions. Pots with good drainage holes are your best friends here because they stop water from gathering at the bottom and giving roots a hard time.
The soak and dry method (best for turtle vines):
- Check if top 2 inches of soil are dry (stick your finger in)
- If dry, water thoroughly until water drains from bottom holes
- Empty drainage tray after 15 minutes
- Wait until top 2 inches dry again before next watering
Watering frequency:
- Spring/Summer: Once per week (or every 5-7 days)
- Autumn/Winter: Every 10-14 days (less frequent)
- Always check soil first rather than following a strict schedule!
As colder months roll around, ease up on watering. Your turtle vine doesn’t need as much then since it’s taking a bit of a rest.
Signs of underwatering:
- Drooping, limp leaves
- Dry, crispy leaves
- Slow growth
- Leaves dropping off
Signs of overwatering:
- Yellowing leaves (especially lower ones)
- Mushy, black stems
- Root rot
- Fungus gnats
- Foul smell from soil
Using pots without drainage? Be careful not to overdo it; too much water can lead to trouble like root rot, which is bad news for your green buddy. Keep things just moist enough, and your plant will thrive indoors, showing off its beautiful trailing habit and making any indoor space brighter and more lively.
Temperature and humidity
Turtle vine does well in warm temperatures between 15.5°C and 26.5°C (60-80°F). These ranges make it a perfect fit for indoor spaces, where controlling the climate is easier. You should move your plant inside during the winter months if you live in a cooler area. Cold temperatures below 13°C can harm your turtle vine.
Ideal conditions:
- Temperature: 18-24°C (65-75°F)
- Minimum safe temperature: 13°C (55°F)
- Maximum temperature: 29°C (85°F)
Temperature tips:
- Keep away from cold drafts (windows, doors)
- Avoid placement near heating vents or radiators
- Don’t let leaves touch cold window panes in winter
- Bring outdoor plants inside when temperatures drop below 15°C
Maintaining moderate to high humidity levels, around 40% to 50%, is also crucial for this creeping inch plant’s health. The good news is that average household humidity is usually fine! In dryer conditions, consider placing a tray of water near the plant or using a humidifier to boost moisture in the air. This helps mimic its natural habitat, ensuring vibrant growth and health.
How to increase humidity:
- Group plants together
- Place on a pebble tray with water
- Use a room humidifier
- Mist occasionally (not essential but appreciated)
- Keep in naturally humid rooms (bathroom, kitchen)
Maintenance and Care
Regular maintenance keeps your turtle vine looking full, healthy, and vibrant. Here’s everything you need to know about pruning and fertilising.
Pruning techniques
To keep your Turtle Vine looking its best, you need to get into the habit of regular pruning. Early spring is the perfect time to start this task. Cut off dead or overgrown stems to help the plant stay healthy and maintain a nice shape. This also stops it from getting too leggy. Make sure to use clean scissors or secateurs for cutting.
When to prune:
- Early spring (best time for major pruning)
- Throughout the growing season (light maintenance)
- Any time stems become too long or leggy
- When you want to propagate new plants
How to prune:
- For bushier growth: Pinch back stems just above a leaf node. This encourages the plant to branch out and become fuller
- For length control: Cut stems back to the desired length, always cutting just above a node
- For maintenance: Remove any dead, damaged, or yellowing leaves as you spot them
- For propagation: Take 5-10cm cuttings (we’ll cover this in detail below!)
Pruning tips:
- Always use clean, sharp scissors or pruners
- Cut at a 45-degree angle just above a leaf node
- Don’t remove more than 1/3 of the plant at once
- Save your cuttings for propagation!
For a fuller plant, pinch back the stems. Doing this encourages the Turtle Vine to grow more branches, making it look bushier and more appealing as a houseplant. Just take out small pieces at each pinch point; you don’t have to remove much.
The result of regular pruning:
- Fuller, bushier appearance
- More compact growth
- Encourages new growth
- Prevents bare, leggy stems
- Keeps the plant looking tidy
Fertilisation schedules
After talking about how to prune your turtle vine, let’s move on to feeding it. Keeping your plant healthy includes giving it the right food at the right times.
Fertilising schedule:
- Spring to Summer (growing season): Every 4 waterings
- Autumn: Monthly
- Winter: Stop completely or every 2 months at most
How to fertilise:
- Use a balanced, general-purpose liquid houseplant fertiliser (10-10-10 or 20-20-20)
- Dilute to half the recommended strength on the bottle
- Always water your plant before adding fertiliser (helps distribute nutrients and prevents root burn)
- Apply fertiliser to moist soil only
Signs your plant needs fertilising:
- Slow growth during the growing season
- Pale or yellowing leaves (if watering is correct)
- Loss of vibrant colour
- Smaller new leaves
Signs of over-fertilising:
- Brown, crispy leaf tips
- White crust on the soil surface (salt buildup)
- Wilting despite proper watering
- Stunted growth
By following these pointers, you’ll see great results in your plant’s health and appearance.
Complete Propagation Guide
One of the best things about turtle vines is how incredibly easy they are to propagate! You can create dozens of new plants from one mother plant, and it’s almost foolproof.
Why propagate your turtle vine?
- Make it bushier: Put cuttings back into the mother plant’s pot
- Fill bare spots: Place new cuttings where stems have become sparse
- Expand your collection: Create new plants for other rooms
- Save a dying plant: If the main plant has root rot, healthy cuttings can survive
Best time to propagate
Ideal season: Spring and early summer (when the plant is actively growing)
You can also propagate:
- Any time of year indoors with good light
- When pruning leggy growth
- If the plant becomes root-bound
Method 1: Water Propagation (Easiest & Most Reliable!)
This is my favourite method because you can watch the roots develop!
What you need:
- Clean scissors or pruning shears
- Small glass jar or container
- Room temperature water
- Healthy turtle vine plant
Step-by-step instructions:
- Select healthy stems: Choose stems that are green, firm, and healthy-looking. Each cutting should be 5-10cm (2-4 inches) long
- Make your cuts: Cut just below a leaf node (the bump where leaves attach to the stem). You can take multiple cuttings!
- Remove lower leaves: Strip off the bottom 2-3cm of leaves so you have a bare stem to place in water. Leaves shouldn’t touch the water or they’ll rot
- Place in water: Put cuttings in a jar of room-temperature water. The nodes must be submerged, but the leaves should be above water
- Choose location: Place jar in bright, indirect light. Avoid direct sunlight
- Change water regularly: Replace water every 3-4 days to keep it fresh and prevent bacteria
- Watch roots grow: Within 7-14 days, you’ll see tiny white roots emerging from the nodes! It’s so satisfying to watch
- Wait for good root development: Let roots grow to at least 2-3cm long before planting (usually 2-3 weeks total)
- Plant in soil: Once roots are established, plant in moist potting mix. Keep soil consistently moist for the first week
- Care for new plant: Treat like a regular turtle vine, but be gentle with watering until it’s fully established (2-3 weeks)
Pro tips for water propagation:
- Take multiple cuttings at once (not all may succeed)
- Use a clear container so you can see root development
- Room temperature water works best
- Roots grow faster in warm conditions
- You can leave cuttings in water for months if you keep changing the water!
Method 2: Direct Soil Propagation
This method skips the water stage and goes straight to soil.
What you need:
- Clean scissors
- Small pot with drainage holes
- Well-draining potting mix
- Rooting hormone (optional, but helps)
Step-by-step instructions:
- Take cuttings: Select healthy 5-10cm stem sections, cutting just below a node
- Prepare cuttings: Remove bottom leaves as in water propagation method
- Optional rooting hormone: Dip the cut end in rooting hormone powder
- Prepare pot: Fill small pot with moist (not soggy) potting mix with good drainage
- Plant cuttings: Make small holes with a pencil, insert cuttings, and firm soil around them. You can plant 3-5 cuttings per pot for instant fullness!
- Water lightly: Water just enough to settle soil around cuttings
- Create humidity: Place a clear plastic bag over the pot, or use a humidity dome. This creates ideal conditions
- Location: Put in bright, indirect light
- Maintain moisture: Keep soil lightly moist (not wet) for the first 2-3 weeks
- Check for roots: After 2-3 weeks, gently tug on cuttings. Resistance means roots have formed!
- Remove humidity dome: Once rooted, gradually remove the plastic bag over a few days
- Resume normal care: Treat as a regular turtle vine
Method 3: Layering (The Lazy Method!)
This method lets the stems root while still attached to the mother plant.
Step-by-step:
- Choose a long stem: Select a trailing stem that’s long enough to reach the soil
- Make contact with soil: Place part of the stem onto the soil in the same pot or a neighbouring pot
- Pin down: Use a small piece of wire or a bobby pin to hold the stem against the soil
- Wait: Keep soil moist. Roots will form at nodes touching the soil in 2-4 weeks
- Cut and separate: Once rooted, cut the stem from the mother plant
This method is foolproof because the cutting is still fed by the mother plant while it develops roots!
Making Your Turtle Vine Bushier with Propagation
Want a really full, lush turtle vine? Here’s the secret:
- Take multiple cuttings (10-15) from your plant
- Root them in water until roots are 2-3cm long
- Plant them all back into the mother plant’s pot, spacing them around the edges
- Result: In a few weeks, you’ll have an incredibly full, bushy plant!
This is what I did with mine, and it made such a difference. It went from looking sparse to absolutely gorgeous!
Troubleshooting Propagation Problems
Cuttings rotting in water:
- Change water more frequently (every 2-3 days)
- Make sure no leaves are touching the water
- Use filtered or boiled (cooled) water
- Try fewer cuttings per jar (overcrowding causes rot)
Cuttings rotting in soil:
- Soil too wet – let it dry out more between waterings
- No drainage – ensure the pot has holes
- Too cold – keep in warmer location (18-24°C)
No roots forming:
- Be patient – turtle vine usually roots in 7-14 days, but can take up to 3 weeks
- Check that nodes are submerged/in contact with soil
- Increase warmth (place near a heat source but not direct heat)
- Ensure adequate light (bright, indirect)
Cuttings wilting:
- Increase humidity with a plastic bag or dome
- Ensure soil is moist (not wet or dry)
- Move out of direct sunlight
- Some wilting is normal for the first few days
Leaves turning yellow on cuttings:
- Normal for the bottom leaves to yellow and drop
- If all leaves are yellowing: too much water or not enough light
- Trim the yellow leaves off
Troubleshooting Common Problems
While turtle vines are generally easy-care plants, they can encounter a few issues. Here’s how to identify and solve them.
Problem 1: Yellow Leaves
Possible causes:
Overwatering (most common)
- Symptoms: Yellowing lower leaves, mushy stems, foul soil smell
- Solution: Let the soil dry out more between waterings, check for root rot, and improve drainage
Underwatering
- Symptoms: Yellowing all over, dry, crispy leaves, drooping
- Solution: Water more consistently, check the soil stays lightly moist
Low light
- Symptoms: Yellowing with leggy growth, pale overall colour
- Solution: Move toa brighter location
Natural aging
- Symptoms: Only the oldest, bottom leaves are yellowing
- Solution: Normal! Just trim them off
Problem 2: Leggy, Sparse Growth
Causes:
- Not enough light (main cause)
- Needs pruning
- Natural growth habit
Solutions:
- Move to a brighter location (but still indirect light)
- Prune regularly to encourage branching
- Pinch back stem tips
- Propagate cuttings and plant them back for fullness
- Rotate the plant weekly for even growth
Problem 3: Brown Leaf Tips
Causes:
- Low humidity (though turtle vine is fairly tolerant)
- Fluoride or chlorine in tap water
- Over-fertilizing
- Underwatering
Solutions:
- Increase humidity slightly
- Use filtered or rainwater
- Reduce fertiliser frequency
- Water more consistently
- Trim brown tips with clean scissors
Problem 4: Drooping, Wilting Stems
Causes:
Underwatering
- Solution: Water thoroughly, stems should perk up within hours
Overwatering/Root rot
- Solution: Check roots, trim any rotted parts, repot in fresh soil, and reduce watering
Temperature shock
- Solution: Keep away from cold drafts, maintain a consistent temperature
Problem 5: Pests
While not common, turtle vines can attract pests.
Spider Mites
Identification: Fine webbing on stems, stippled leaves, tiny moving dots
Solution:
- Spray the plant with water to dislodge
- Wipe leaves with a damp cloth
- Apply neem oil or insecticidal soap
- Increase humidity (mites hate moisture)
- Isolate from other plants
Mealybugs
Identification: White, cottony clusters in leaf joints
Solution:
- Remove with a cotton swab dipped in rubbing alcohol
- Spray with insecticidal soap
- Check the plant weekly until it is clear
Aphids
Identification: Small green, black, or white bugs on new growth
Solution:
- Spray with water
- Wipe with soapy water
- Use neem oil spray
- Introduce beneficial insects if outdoors
Fungus Gnats
Identification: Small black flies around soil, larvae in soil
Solution:
- Let the soil dry out more between waterings
- Use yellow sticky traps
- Top dress the soil with sand
- Apply mosquito bits or neem to the soil
Problem 6: Fungal Diseases
Root Rot
- Cause: Overwatering, poor drainage
- Symptoms: Yellowing leaves, mushy black stems, foul smell, plant collapse
- Solution: Remove from pot, trim rotted roots, repot in fresh soil, reduce watering
Leaf Spot
- Cause: Fungal infection, usually from wet leaves and poor air circulation
- Symptoms: Brown or black spots on leaves
- Solution: Remove affected leaves, improve air circulation, avoid getting leaves wet, apply fungicide if severe
Different Varieties
While the standard green Callisia Repens is beautiful, there are some stunning varieties worth knowing about:
Callisia Repens ‘Pink Lady’ (Pink Turtle Vine)
The most popular variety! Features:
- Pink and cream variegated leaves
- Purple undersides
- Same care as standard turtle vine
- Needs slightly more light to maintain pink colouration
- Absolutely stunning!
Callisia Repens ‘Bianca’
Less common but gorgeous:
- White and green variegated leaves
- More compact thanthe standard variety
- Needs bright light to prevent reverting to all green
- Same care requirements
Callisia Repens ‘Variegata’
Features cream and green striped leaves. Care is identical to standard turtle vine.
Note: Variegated varieties need slightly more light than the all-green version to maintain their coloration. Without enough light, they may revert to all green.
FAQs
1. Is turtle vine easy to care for?
Yes! Turtle vine (Callisia Repens) is one of the easiest houseplants to care for, making it perfect for beginners. It tolerates a range of conditions, grows quickly, and is very forgiving of occasional neglect. The main requirements are bright indirect light and regular watering – if you can provide those, your turtle vine will thrive.
2. How do I make my turtle vine bushier?
To create a fuller, bushier turtle vine: Prune regularly by pinching back stem tips (this encourages branching), provide bright light (leggy growth indicates insufficient light), propagate cuttings and plant them back into the mother plant’s pot for instant fullness, and fertilise during the growing season to support vigorous growth. Regular pinching is the key to a bushy plant!
3. How fast does turtle vine grow?
Turtle vine is a fast-growing plant! In ideal conditions (bright light, regular watering, spring/summer months), it can grow several inches per month. Stems can extend 30-60cm (12-24 inches) in a single growing season. This rapid growth is why it’s such a popular trailing plant for hanging baskets. Growth slows significantly in autumn and winter.
4. Can I propagate turtle vine in water or soil?
You can use both methods successfully! Water propagation is easiest and most reliable – cuttings typically root in 7-14 days, and you can watch the roots develop. Soil propagation works well, too, though you can’t see the roots forming. Both methods have a very high success rate with turtle vine. Many people (including me!) prefer water propagation because it’s satisfying to watch the roots grow.
5. Why is my turtle vine turning yellow?
Yellow leaves usually indicate overwatering (most common – yellowing lower leaves with wet soil), underwatering (yellowing all over with dry, crispy leaves), low light (pale yellowing with leggy growth), or natural ageing (only the oldest bottom leaves). Check your watering habits first – stick your finger in the soil. If it’s constantly wet, reduce watering if it’s bone dry, water more consistently.
6. Does turtle vine need a lot of light?
Turtle vine needs bright, indirect light for at least 6 hours daily. It prefers east or west-facing windows or 1-2 metres back from a south-facing window. While it can survive in lower light, it will become leggy and sparse. It doesn’t tolerate direct intense sunlight, which can scorch the leaves. The right light is key to maintaining compact, bushy growth and vibrant stem colour.
7. How often should I water my turtle vine?
Water when the top 2 inches of soil feel dry tothe touch. This typically means once per week in spring/summer and every 10-14 days in autumn/winter. Always check the soil first rather than following a strict schedule – watering needs vary based on pot size, light levels, and temperature. Turtle vine prefers consistently moist (but not soggy) soil. Never let it dry out completely or sit in water.
8. Is turtle vine toxic to pets?
Turtle vine (Callisia Repens) is generally considered pet-safe and is not listed as toxic by major pet poison databases. However, like most plants, eating large quantities may cause mild stomach upset in pets. It’s best to keep plants out of reach if your pet is a serious plant chewer, but it’s a much safer choice than many common houseplants.
9. Why is my turtle vine leggy?
Leggy growth (long stems with spaces between leaves) is almost always caused by insufficient light. Move your plant to a brighter location with indirect light. Once there, prune back the leggy stems to encourage bushier growth – don’t worry, it grows back quickly! You can propagate those leggy cuttings and plant them back for a fuller appearance. Regular pruning prevents legginess.
10. Can turtle vine grow in low light?
Turtle vine can survive in low light but won’t thrive. In low light conditions, you’ll see leggy, stretched growth, loss of purple stem colour, slower growth, and sparse foliage. It really needs bright, indirect light to look its best. If you don’t have a bright natural light spot, consider using a grow light – turtle vine does well under artificial lighting.
11. When should I repot my turtle vine?
Repot your turtle vine when roots start growing out of drainage holes, soil drains very quickly (pot-bound), or the plant has outgrown its container (typically every 1-2 years). The best time to repot is in spring just as active growth begins. Choose a pot only 2-5cm larger than the current one – turtle vine doesn’t mind being slightly pot-bound and too large a pot can lead to overwatering.
12. Can I grow turtle vine outside?
You can grow turtle vine outdoors if you live in a warm climate (USDA zones 9-11) where temperatures stay above 13°C year-round. In cooler climates, it makes an excellent seasonal outdoor plant for patios or balconies in summer, but must come inside before temperatures drop in autumn. Protect from direct intense sunlight and cold drafts.
13. How do I prune turtle vine?
Prune turtle vine by cutting or pinching stems just above a leaf node (the bump where leaves attach). Use clean, sharp scissors and cut at a 45-degree angle. For bushier growth, pinch back tips throughout the growing season. For major pruning, do it in early spring. Never remove more than 1/3 of the plant at once. Save all cuttings for propagation – they root easily!
14. What’s the difference between turtle vine and inch plant?
Turtle vine (Callisia Repens) and inch plant (Tradescantia zebrina) are related plants in the same family (Commelinaceae) and have similar care needs. However, they’re different species. Turtle vine has smaller, rounder leaves and purple stems, while inch plant has larger, elongated leaves with purple and silver stripes. Both are easy-care trailing plants perfect for beginners.
15. My turtle vine is bare at the base with growth only at ends – what should I do?
This is common with older turtle vines and happens when stems get very long. The solution: Propagate! Cut back the long stems to 10-15cm, propagate all those cuttings in water, and once rooted, plant them back into the pot around the edges. This creates a full, bushy plant. You can also use the layering method – pin trailing stems back into the soil where they’ll root while still attached to the mother plant.
Good Luck With Your Turtle Vine Plant!
The turtle vine is an easy plant to take care of and propagate. It’s low maintenance and low worry. Great for beginners who may feel overwhelmed with all the rules for plant care!
Key takeaways:
- Bright, indirect light keeps it compact and colourful
- Water when top 2 inches of soil are dry
- Prune regularly for fullness
- Propagate easily in water or soil
- Perfect for hanging baskets or trailing over shelves
- Incredibly forgiving and fast-growing
Whether you discovered your turtle vine by accident, like I did, or intentionally sought it out, you’re going to love watching it grow. The combination of easy care, beautiful foliage, and rapid growth makes it one of my favourite houseplants. And the fact that you can propagate it endlessly means you’ll soon have turtle vines for every room – and plenty to share with friends!
Happy growing!
Related posts:
- How To Care For A Venus Fly Trap
- Non-Toxic Succulents For Cats
- Cat-Friendly House Plants UK
- Spider Plant Care Tips For Healthy Growth
- Prayer Plant Care
- Chinese Money Plant Care
- 13 Best Houseplants For Dark Rooms
- Health Benefits Of Having Plants In Your Home
- Monstera Plant Care
- Fittonia Plant Care
- Tradescantia albiflora Nanouk Care Guide


You May Also Like

The Complete Guide to Houseplants UK

Houseplant Fertiliser Guide: When and How to Feed Indoor Plants
